Imagine you’re starting a new project, and you have tons of ideas but no clear way to organize them. User story mapping is a way to help you enhance your agile project management (APM) process.
Understanding User Story Mapping
Starting a new project can be overwhelming. You might have a mountain of ideas but no clear way to organize them. This is where user story mapping comes in. It’s like creating a roadmap for your project, making it easier to visualize the journey from start to finish and ensuring you don’t miss any critical steps along the way.
What is User Story Mapping?
User story mapping is a method used in Agile project management (APM) to create a visual representation of the product’s user journey. It breaks down the project into manageable parts, showing the tasks needed to achieve your project goals. Think of it as a way to see the big picture while still focusing on the details.
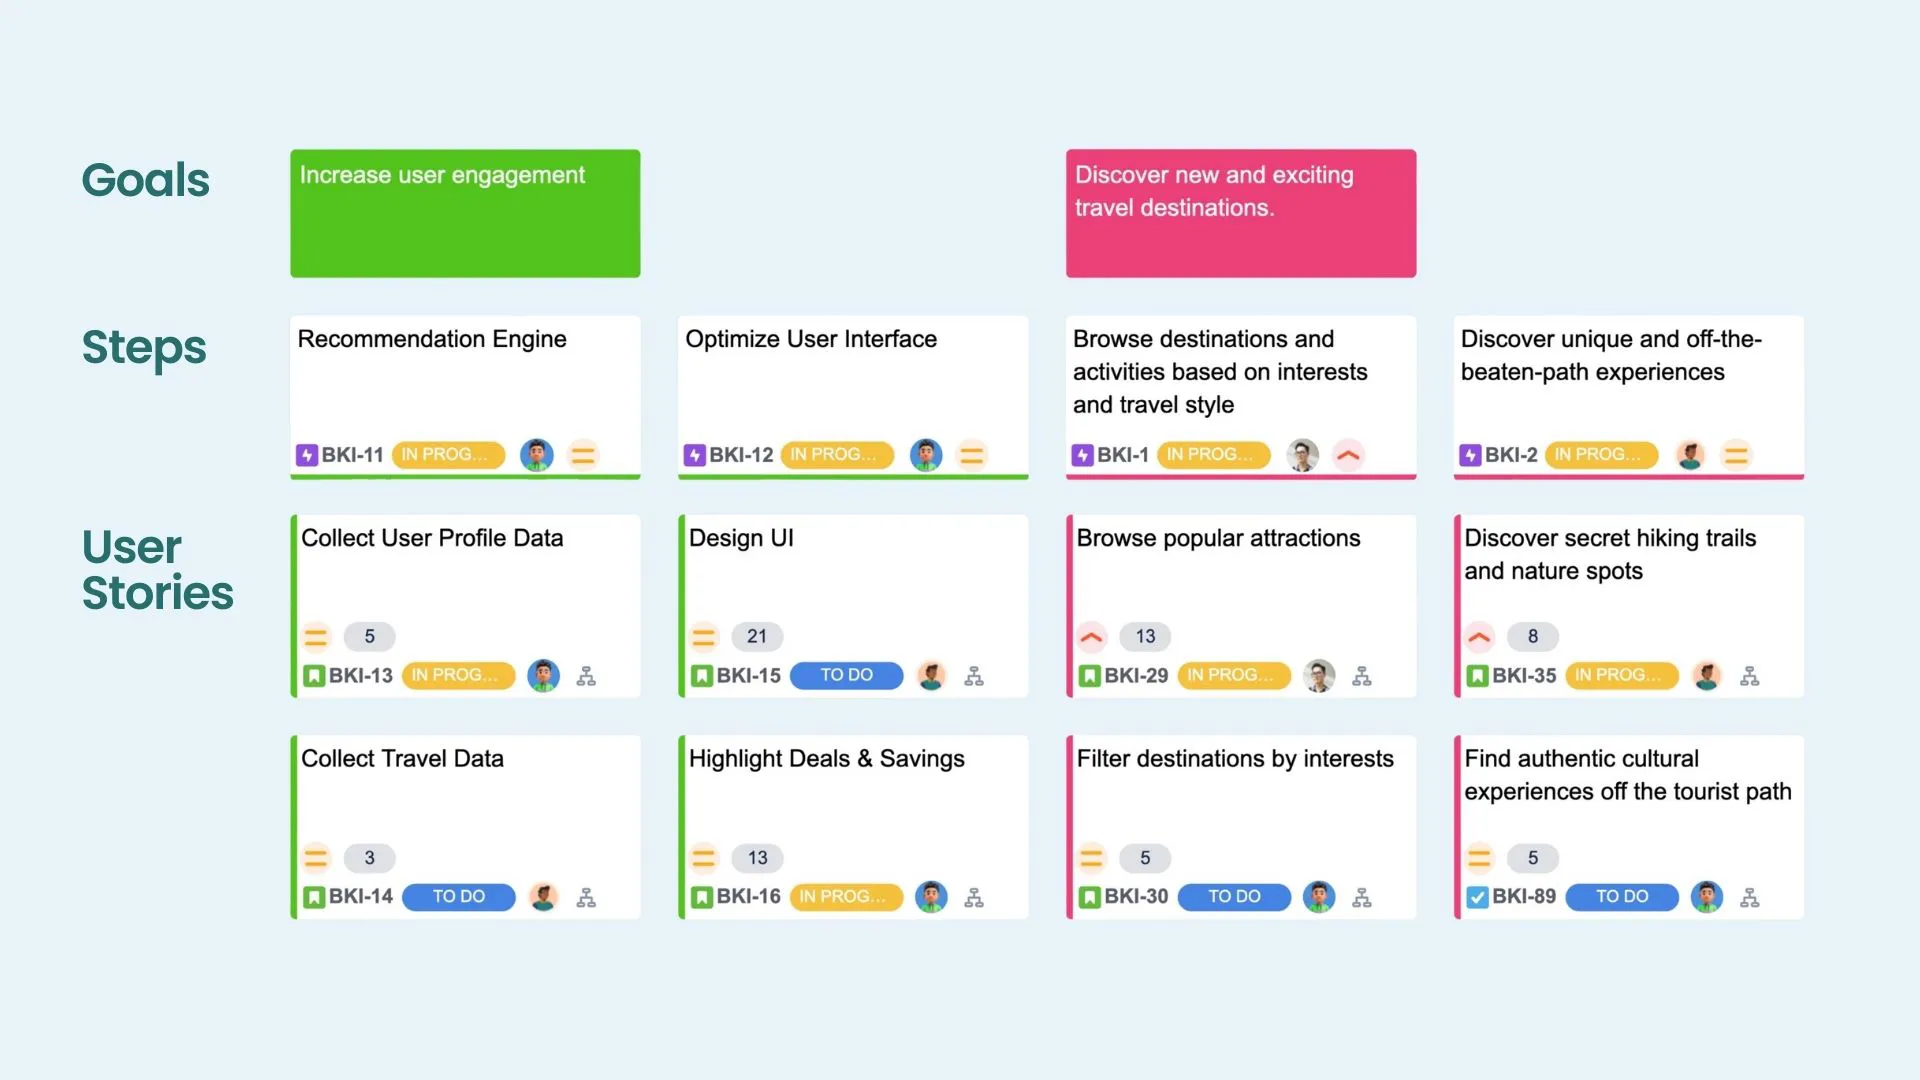
Key Components of a User Story Map
Let’s break down the main components of a user story map:
- Activities: These are the broad actions that users will perform within your product. For example, in a note-taking app, activities could include creating notes, organizing documents, and sharing files.
- User Stories: These are detailed descriptions of features from the user’s perspective. Each activity is broken down into smaller, actionable user stories. For instance, under “creating notes,” a user story might be, “As a user, I want to write notes using a stylus.”
- Prioritization: Once you have your user stories, you need to prioritize them. This means organizing them based on their importance and the value they bring to the user. High-priority tasks are typically placed at the top of the map.
Benefits of User Story Mapping in Agile
Now that we know what a user story map is, let’s explore why it’s so beneficial in APM.
- Visual Overview: A user story map provides a clear visual overview of the entire project.
- Prioritization: Prioritizing user stories ensures that the most important features are developed first. This way, you can deliver maximum value to your users as early as possible.
- Collaboration: When team members from different departments (developers, designers, testers, etc.) gather to create the map, it encourages open communication and idea sharing.
- User-Centric Focus: Keeping the user at the center of the development process is crucial. User story mapping does exactly that by organizing work around user activities and needs.
- Flexibility: Projects often change, and new requirements can emerge. With a user story map, you can easily adjust priorities and add new stories without disrupting the entire project.
By incorporating user story mapping into your Agile practices, you can enhance your APM, delivering a product that is both high-quality and user-friendly.
→ Related content: Manage Multiple Projects in Jira with User Story Map (How To Do It & Benefits)
Use Case: Developing an Advanced Note-Taking and Document Writing App
To see user story mapping in action with APM, let’s walk through the process of developing an advanced note-taking and document-writing app. This example will show how user story mapping can streamline your project, making it more manageable and user-focused.
Scenario
Imagine your tech company is embarking on creating a new app designed to revolutionize the way people take notes and write documents. This app aims to offer features like handwriting recognition, document organization, cloud synchronization, and collaborative editing. The goal is to create a seamless, efficient tool that users will love.
Creating the User Story Map
Step 1: Define the Goals
Before diving into activities, it’s crucial to outline the main goals of the project. These goals encapsulate the overall vision and purpose of the app. For our advanced note-taking and document-writing app, the goals might include:
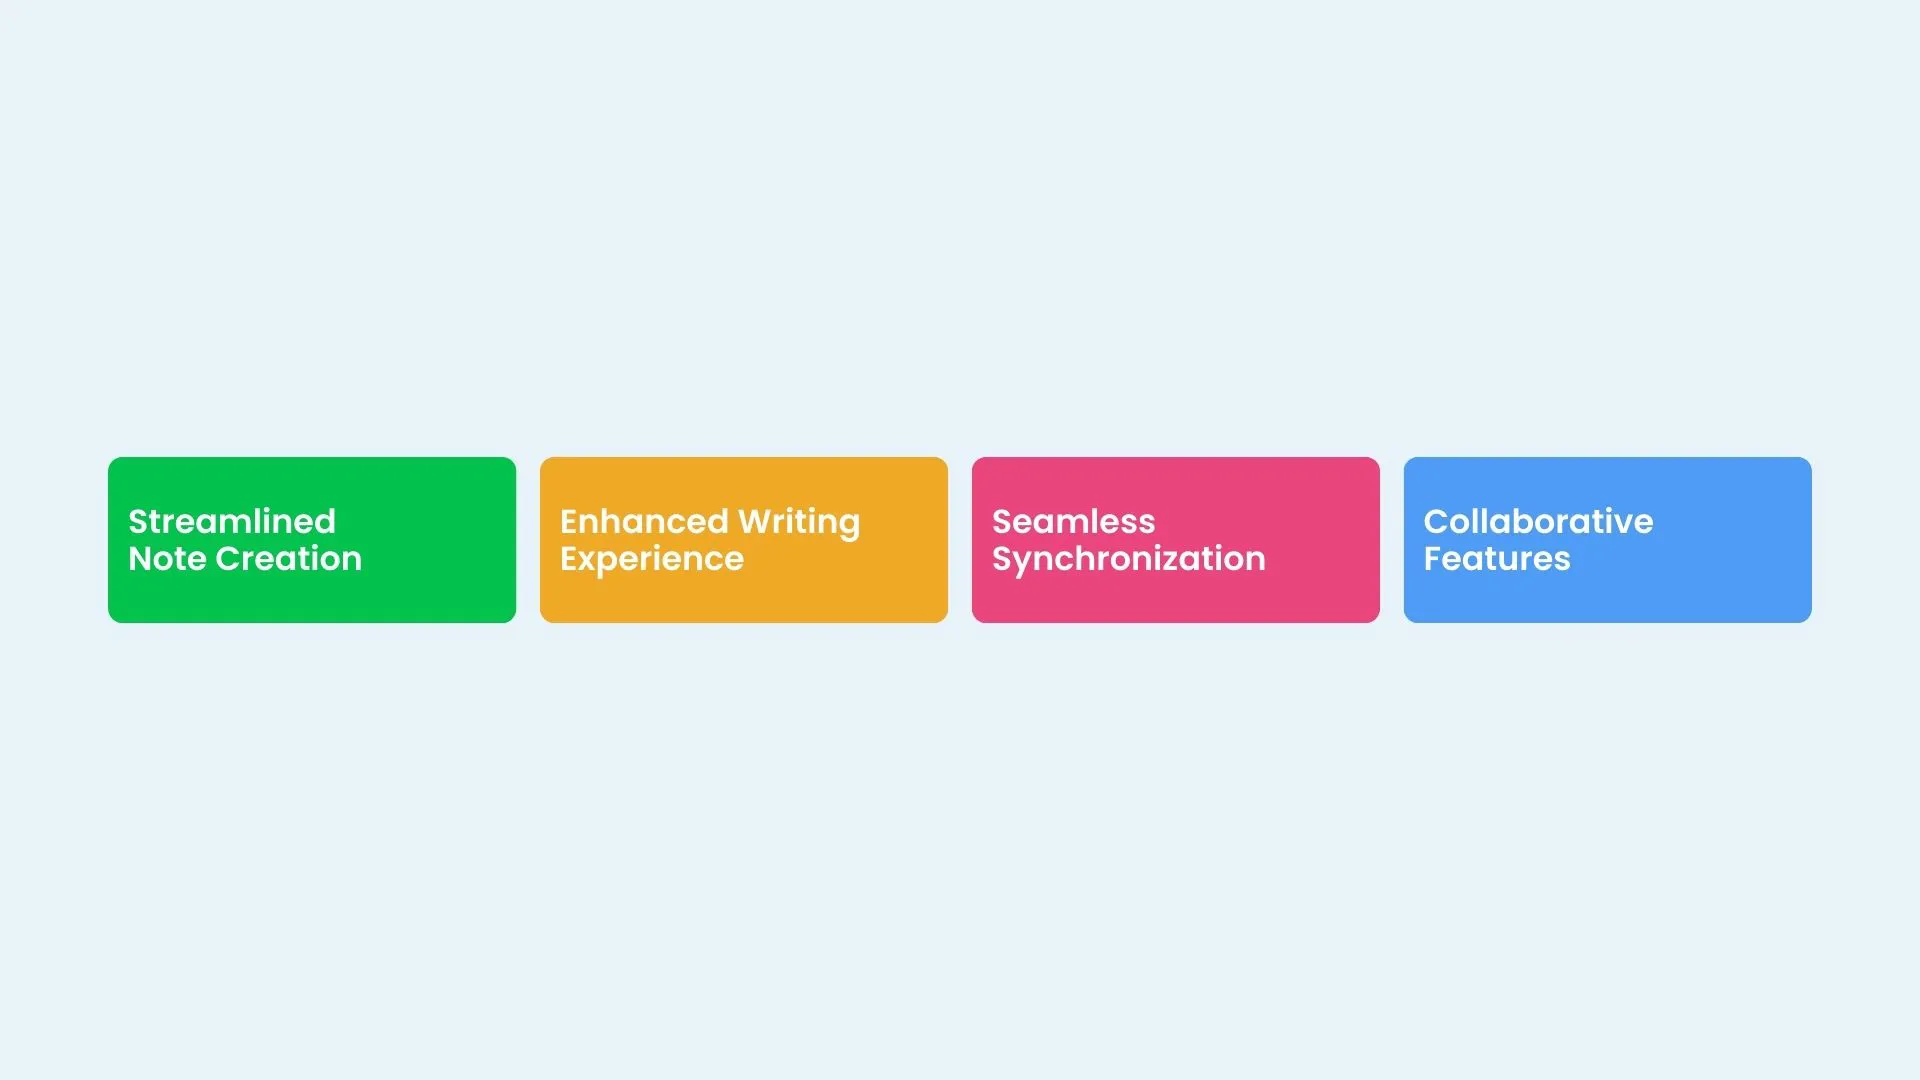
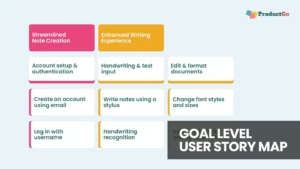
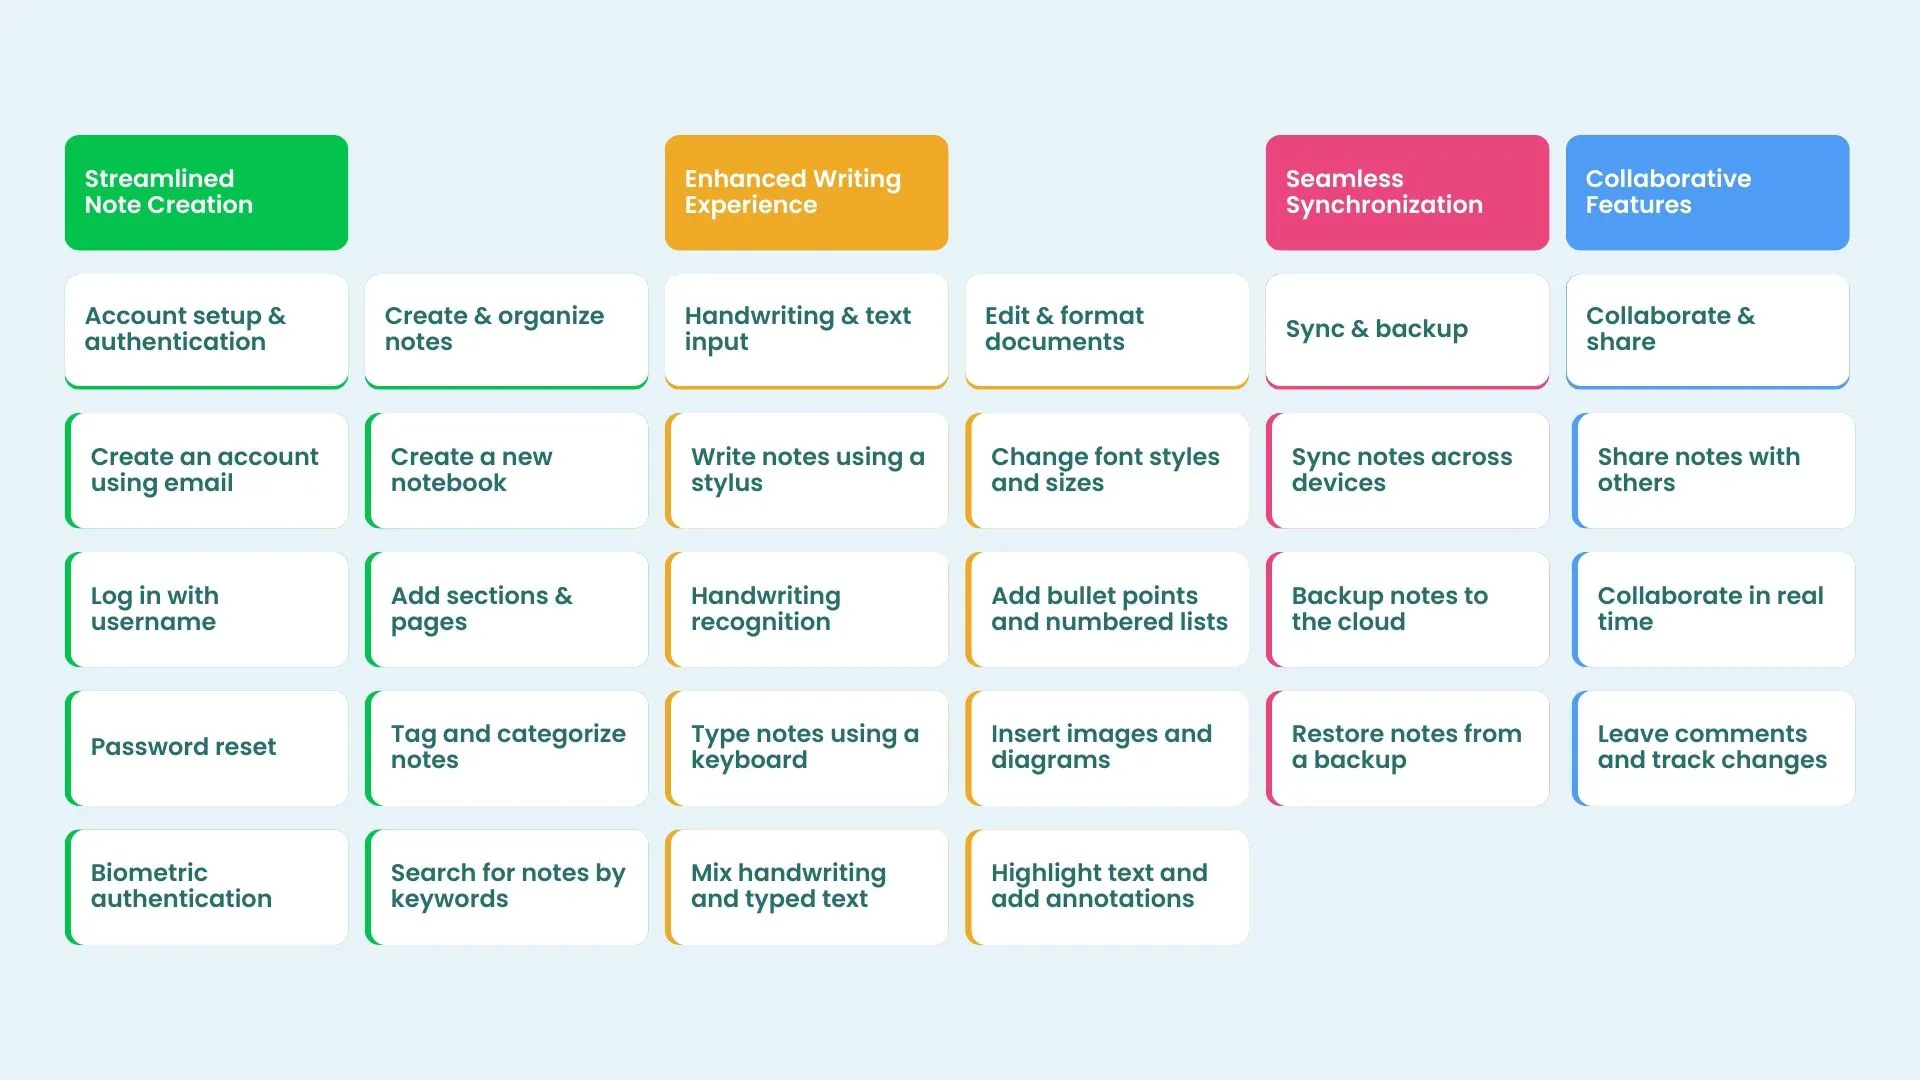
- Streamlined Note Creation: Enable users to create and organize notes effortlessly.
- Enhanced Writing Experience: Provide advanced writing tools, including handwriting recognition and text formatting.
- Seamless Synchronization: Ensure users can access their notes across multiple devices.
- Collaborative Features: Allow users to share and work on notes together in real-time.
Each goal will encompass several user activities that help achieve these objectives.
Step 2: Identify User Activities
With the goals defined, the next step is to identify the key activities users will perform to achieve these goals. These activities are the broad tasks that form the backbone of the user experience. For our app, these might include:
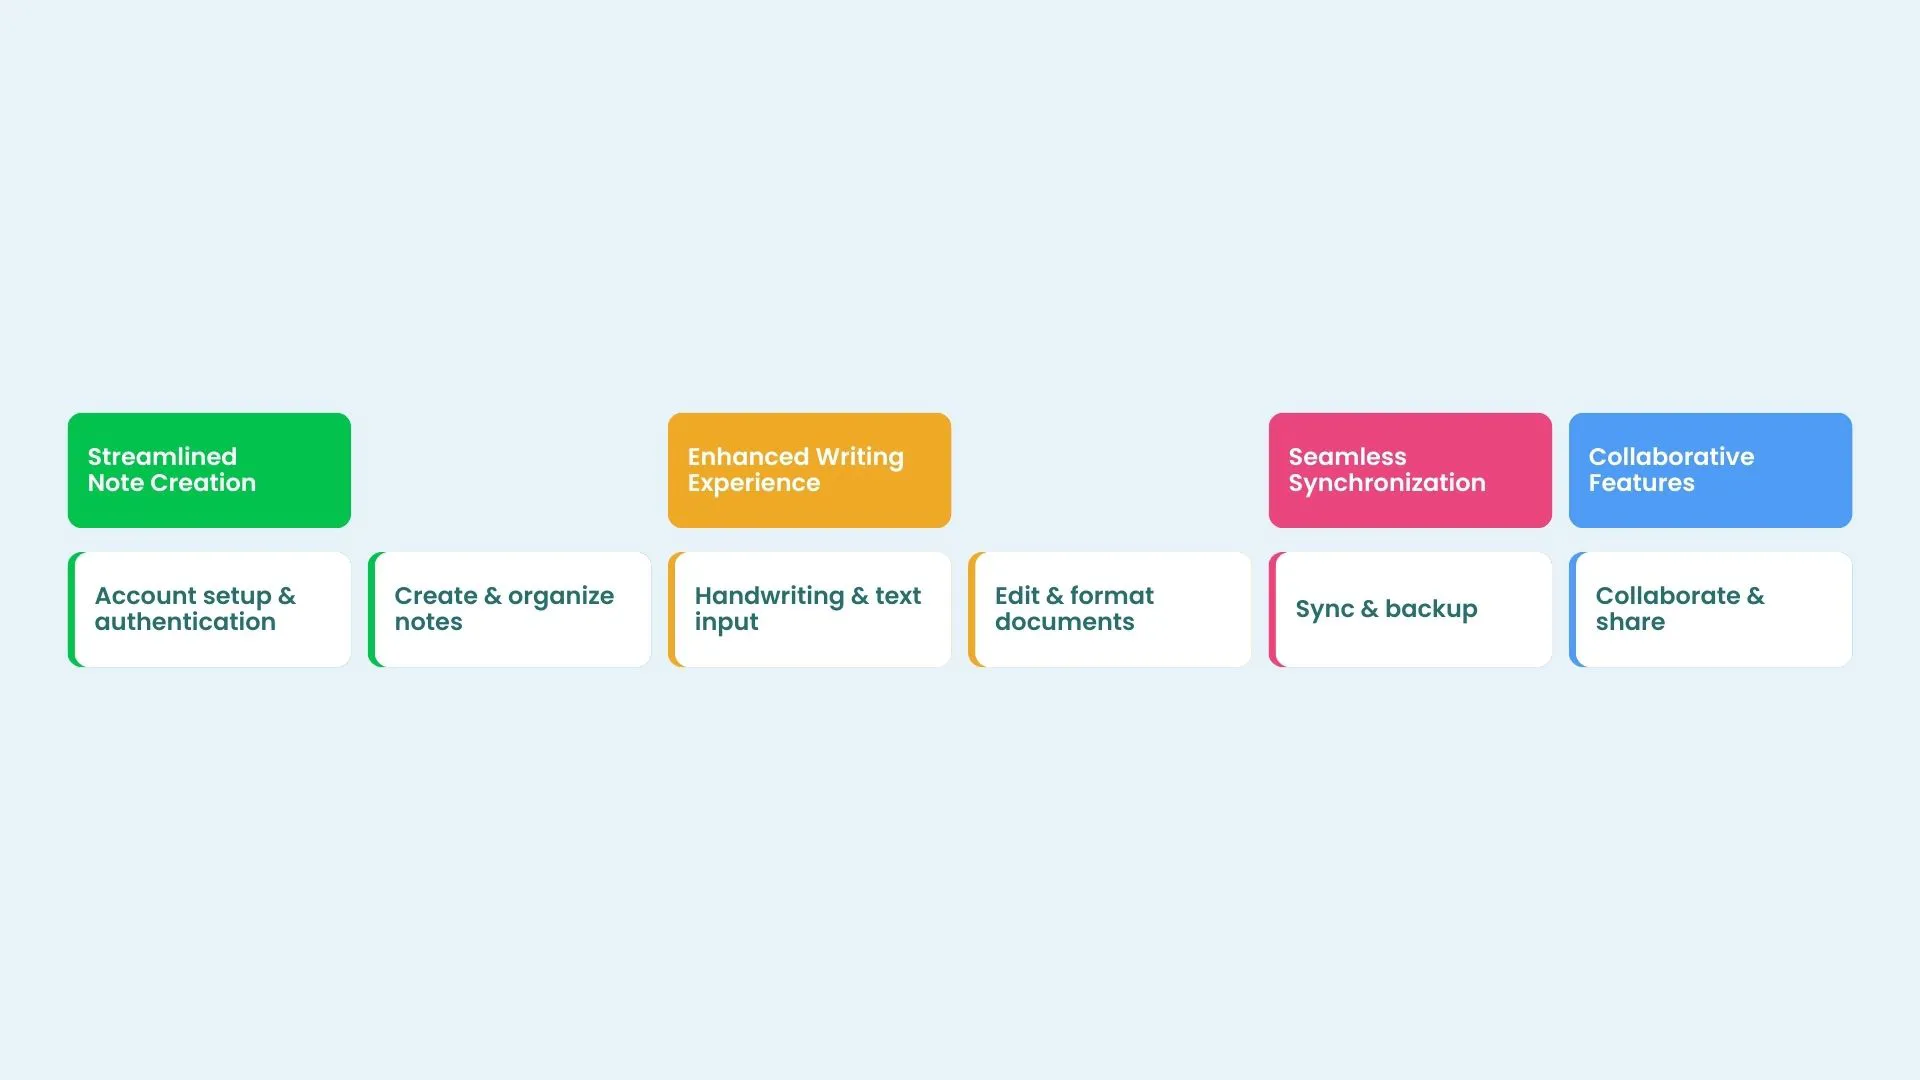
- Account setup and authentication
- Create and organize notes
- Handwriting and text input
- Edit and format documents
- Sync and backup
- Collaborate and share
Step 3: Break Down Activities into User Stories
Next, each activity is broken down into detailed user stories. These stories capture specific features or tasks from the user’s perspective. Here’s how this might look:
- Account setup and authentication
- As a user, I want to create an account using my email.
- As a user, I want to log in with my username and password.
- As a user, I want to reset my password if I forget it.
- As a user, I want to use biometric authentication for quick access.
- Create and organize notes
- As a user, I want to create a new notebook.
- As a user, I want to add sections and pages within a notebook.
- As a user, I want to tag and categorize my notes.
- As a user, I want to search for notes by keywords.
- Handwriting and text input
- As a user, I want to write notes using a stylus.
- As a user, I want handwriting recognition to convert my notes to text.
- As a user, I want to type notes using a keyboard.
- As a user, I want to mix handwriting and typed text in the same document.
- Edit and format documents
- As a user, I want to change font styles and sizes.
- As a user, I want to add bullet points and numbered lists.
- As a user, I want to insert images and diagrams.
- As a user, I want to highlight text and add annotations.
- Sync and backup
- As a user, I want my notes to sync across all my devices.
- As a user, I want to back up my notes to the cloud.
- As a user, I want to restore notes from a backup.
- Collaborate and share
- As a user, I want to share my notes with others.
- As a user, I want to collaborate on documents in real time.
- As a user, I want to leave comments and track changes.
Step 4: Organize the User Stories on the Map
User stories are then organized on the story map under their respective activities. They are prioritized from top to bottom, with the most critical stories at the top. This layout helps in visualizing the workflow and understanding which features are essential for the initial launch and which can be added later.
Step 5: Define Releases and Sprints
Based on the user story map, the project is divided into releases and sprints. Here’s an example breakdown:
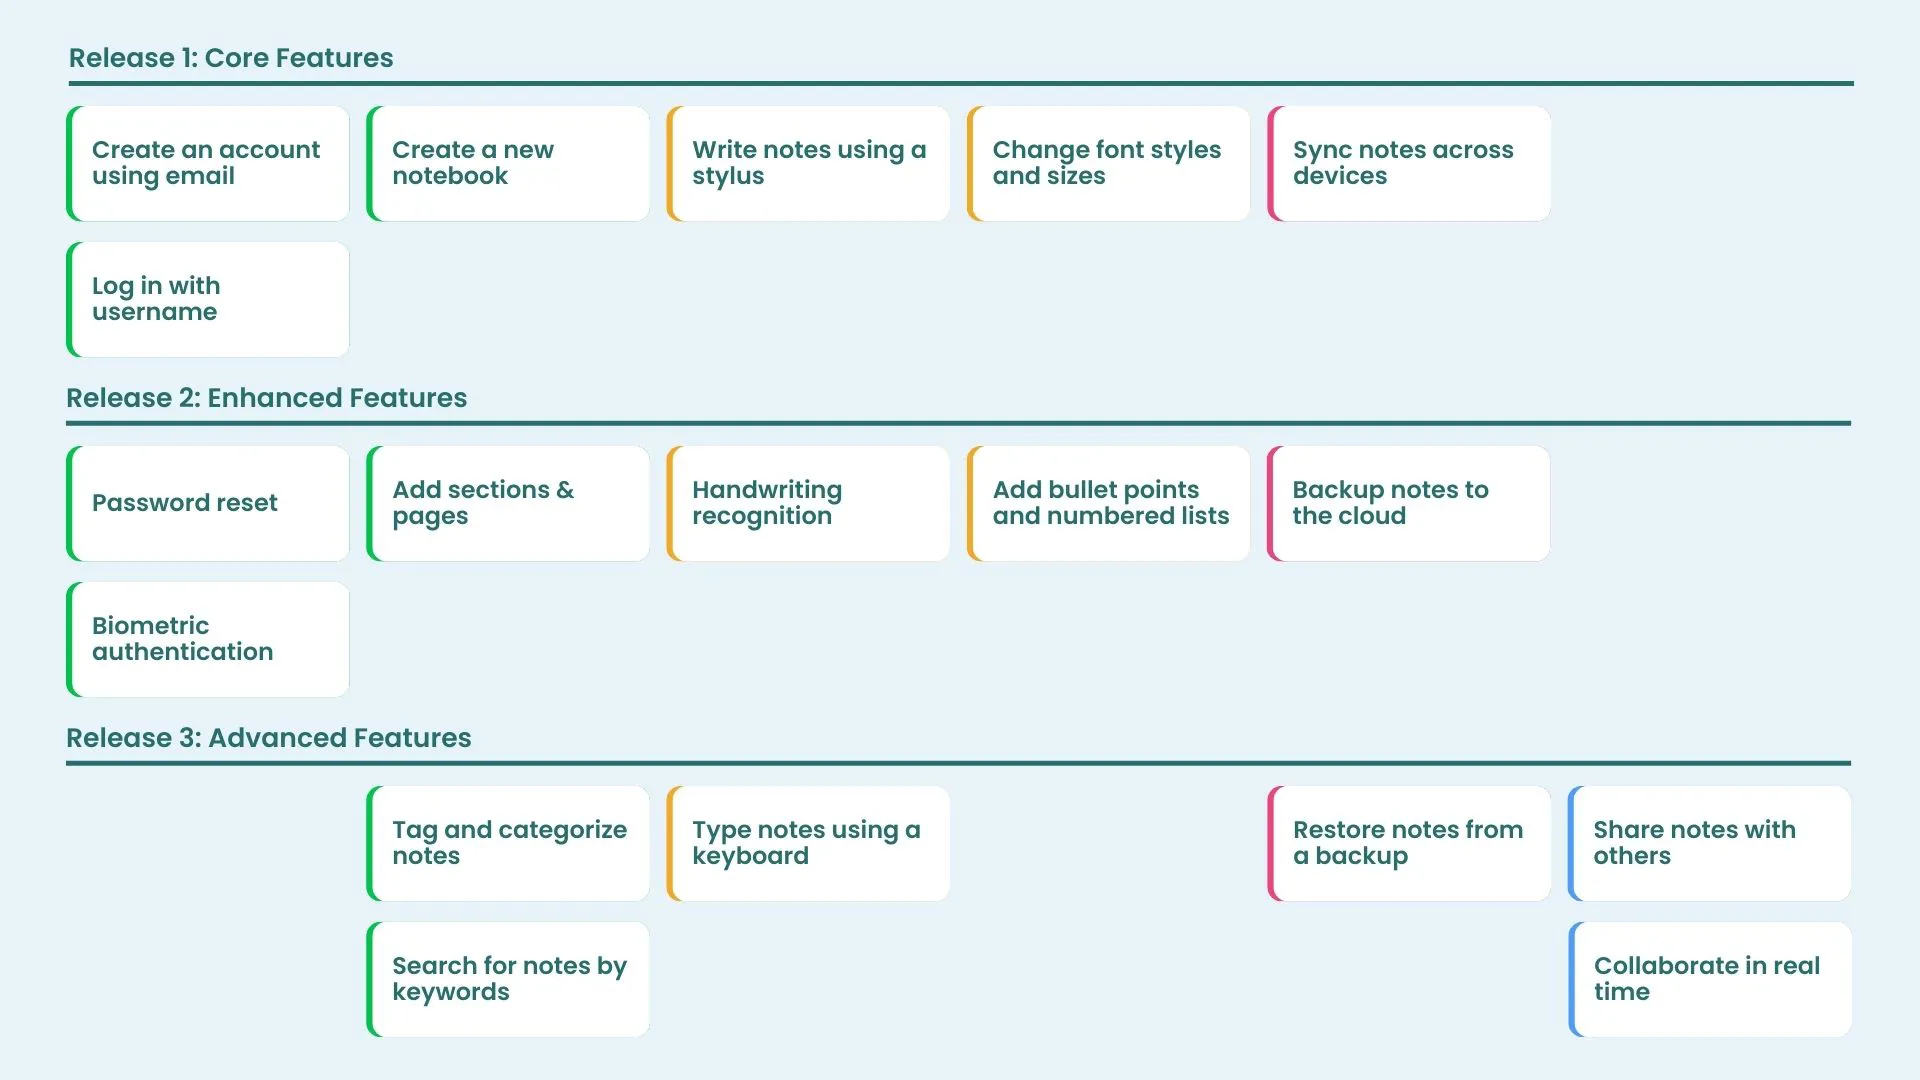
- Release 1: Core Features
- Create an account using email
- Log in with username and password
- Create a new notebook
- Write notes using a stylus
- Change font styles and sizes
- Sync notes across devices
- Release 2: Enhanced Features
- Password reset
- Biometric authentication
- Add sections and pages within a notebook
- Handwriting recognition to convert notes to text
- Add bullet points and numbered lists
- Backup notes to the cloud
- Release 3: Advanced Features
- Tag and categorize notes
- Search for notes by keywords
- Insert images and diagrams
- Share notes with others
- Collaborate on documents in real-time
- Restore notes from a backup
Step 6: Execution and Iteration
The development team starts with the stories defined for Release 1. During each sprint, they work on the highest-priority stories. After each sprint, the team reviews progress, gathers feedback, and makes necessary adjustments. This iterative process ensures continuous improvement and adaptation to any new requirements or feedback.
Step 7: Review and Adjust
Once Release 1 is completed, the team reviews the app with stakeholders and users, gathering valuable feedback. This feedback is used to refine and enhance the subsequent releases. Adjustments are made to the user story map, and future releases are updated accordingly.
How to Get Started with User Story Mapping
So, you’re ready to dive into the world of user story mapping and transform your Agile project management (APM) approach. Here’s a concise guide to help you get started:
Tools and Resources
To create and manage your user story maps effectively, you’ll need the right tools. Here are some popular options:
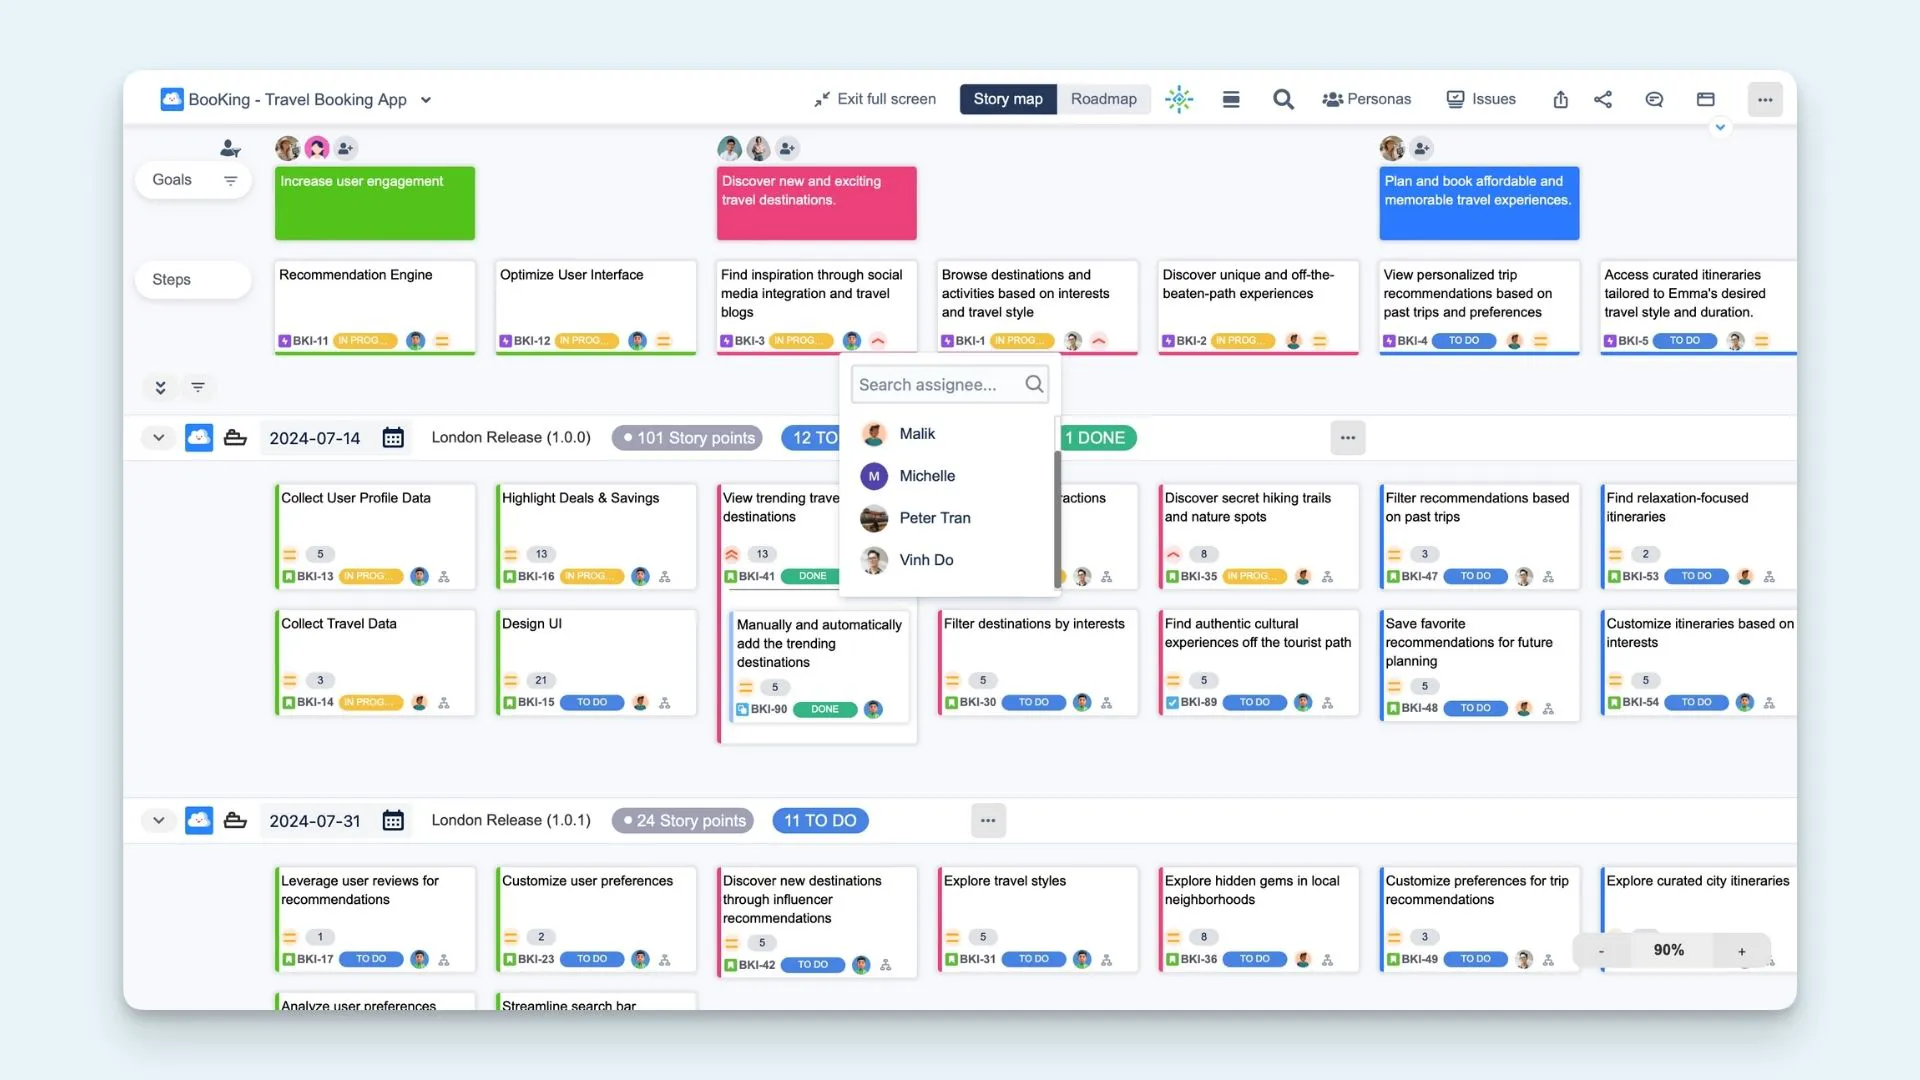
- ProductGo: A user story map tool that seamlessly integrates with Jira Software, allowing teams to create story maps and view their product from the users’ perspective.
- Trello: This versatile project management tool can be easily customized for user story mapping. You can create boards, lists, and cards to represent your goals, activities, and user stories for APM.
- Miro: An online collaborative whiteboard platform, Miro supports user story mapping with its intuitive interface and real-time collaboration features.
Best Practices
- Involve the Whole Team: Encourage collaboration across departments to gather diverse perspectives. Involving developers, designers, testers, and stakeholders ensures that the user story map is comprehensive and well-rounded.
- Stay User-Centric: Always keep the user’s needs and experiences at the forefront of your planning and development. User story mapping helps maintain this focus, ensuring that the product is not only functional but also delightful to use.
- Be Flexible: Be prepared to adjust priorities and add new stories based on feedback and changing requirements. Flexibility is key to adapting to new insights and ensuring that the final product meets user expectations.
- Review Regularly: Continuously review and update the user story map to ensure it aligns with project goals and user feedback. Regular reviews help keep the project on track and allow for timely adjustments.
Conclusion
User story mapping is more than just a planning tool; it’s a strategic approach that brings clarity, prioritization, and collaboration to Agile project management (APM). By breaking down complex projects into manageable user stories and organizing them visually, you ensure that every team member is on the same page and that the user’s needs are always at the forefront.
Ready to transform your Agile project management (APM) approach? Start mapping your user stories today with tools like ProductGo. Gather your team, define your goals, and create a roadmap that leads to success. Happy mapping!