
Creating a Minimum Viable Product (MVP) can feel overwhelming, especially when deciding which features to include. That’s where User Story Mapping comes in. It’s a powerful tool that helps teams focus on what matters most—delivering value to users.
By combining these two approaches, you can build a functional product that meets core needs while leaving room for future improvements.
What is an MVP?
A Minimum Viable Product, or MVP, is the most basic version of a product that you can release to users. It’s simple, with just the core features that solve the main problem your users have. The idea is to get something functional out there quickly and see how people respond to it.
The MVP is all about learning. Instead of spending months building every feature, you release something smaller, then use feedback from real users to improve it. This way, you can avoid wasting time on features people don’t need.
Here’s how an MVP helps:
- Save time and money: Build only what’s essential.
- Get feedback early: Understand what users like or don’t like.
- Stay flexible: Make changes before committing to a bigger product.
Think of it as a starting point. It doesn’t have to be perfect; it just needs to work well enough to show its potential and provide value to users.
→ Related article: Minimum Viable Product (MVP)
Why Combine MVP Development and User Story Mapping?
Developing an MVP is all about delivering value with minimal effort, and User Story Mapping is a perfect match for this process. It’s a visual method that helps you map out what your users need and prioritize the features that matter most. Combining the two gives you a clear direction and keeps everyone on the team focused on the goal.

Here’s why this combination works so well:
- Keeps the user at the center: User Story Mapping is built around understanding the user’s journey. It helps you see things from their perspective and identify what they really need in your MVP.
- Simplifies prioritization: When you map out user stories, you can easily spot which features are essential (the “must-haves”) and which can wait. This makes it easier to decide what goes into your MVP.
- Aligns the team: The visual map ensures that everyone—developers, designers, and stakeholders—is on the same page. It’s easier to communicate the scope and purpose of the MVP when everyone can see how it connects to the user’s needs.
- Minimizes risk: By focusing on the most important parts of the user experience first, you reduce the chances of building something users don’t want.
In short, combining MVP development with User Story Mapping ensures that your team works smarter, not harder. It helps you deliver a product that users will find valuable, while avoiding unnecessary complexity and wasted effort.
Steps to Build an MVP with User Story Mapping
Developing an MVP using User Story Mapping involves a series of well-defined steps that help teams focus on delivering value while staying aligned with user needs. Here’s how to do it:
Step 1: Define Your Goals and Users
The first step is to understand what you aim to achieve and who will use your product.
- Set clear objectives: Determine the main goal of your MVP. This could range from validating a core feature to solving a specific user problem.
- Identify user personas: Outline the primary users of your product and their key pain points or needs. This helps you prioritize features that matter most to them.
Step 2: Map the User Journey
Visualizing the user journey helps you understand how users interact with your product.
- Define key user activities: These are the high-level actions or goals users want to achieve in your product.
- Organize activities in sequence: Arrange these activities in a logical flow, representing the steps users take from start to finish.
Step 3: Break Down Activities into User Stories
User activities need to be detailed into actionable tasks that development teams can work on.
- Write user stories: For each activity, create stories that describe specific actions users take, written from the user’s perspective.
- Organize into steps: Group these stories under their respective activities to ensure the workflow is clear and easy to follow.
Step 4: Create the MVP Swimlane
This is where you decide what makes it into the MVP.
- Identify essential stories: Move the minimum set of stories that deliver a complete and valuable user journey into the MVP swimlane.
- Focus on essentials: Prioritize stories that are critical to achieving the product’s primary goal while leaving advanced or non-essential features for future iterations.
Step 5: Refine User Stories
Once you have selected the stories for your MVP, ensure they are specific and actionable.
- Simplify complex stories: Break down vague or broad stories into smaller, more detailed tasks.
- Clarify objectives: Ensure every story in the MVP has a clear purpose and is easy for the team to understand and implement.
Step 6: Trim the MVP
Even after refining the stories, it’s important to keep the MVP as lean as possible.
- Split oversized stories: If a story still feels too large, break it into smaller parts and decide what’s essential for the first release.
- Remove unnecessary features: Keep only the features that provide the most value and move the rest to later iterations.
By following these steps, you’ll build a focused MVP that delivers meaningful value to users while staying aligned with your overall product vision. User Story Mapping keeps the process organized and ensures your team knows exactly what to prioritize and why.
Tool for User Story Mapping
When it comes to User Story Mapping, ProductGo is a powerful tool designed to simplify the process. It integrates seamlessly with Jira, offering an intuitive interface for visualizing user journeys and organizing tasks. This makes it easier for teams to identify essential features and stay aligned with user needs.
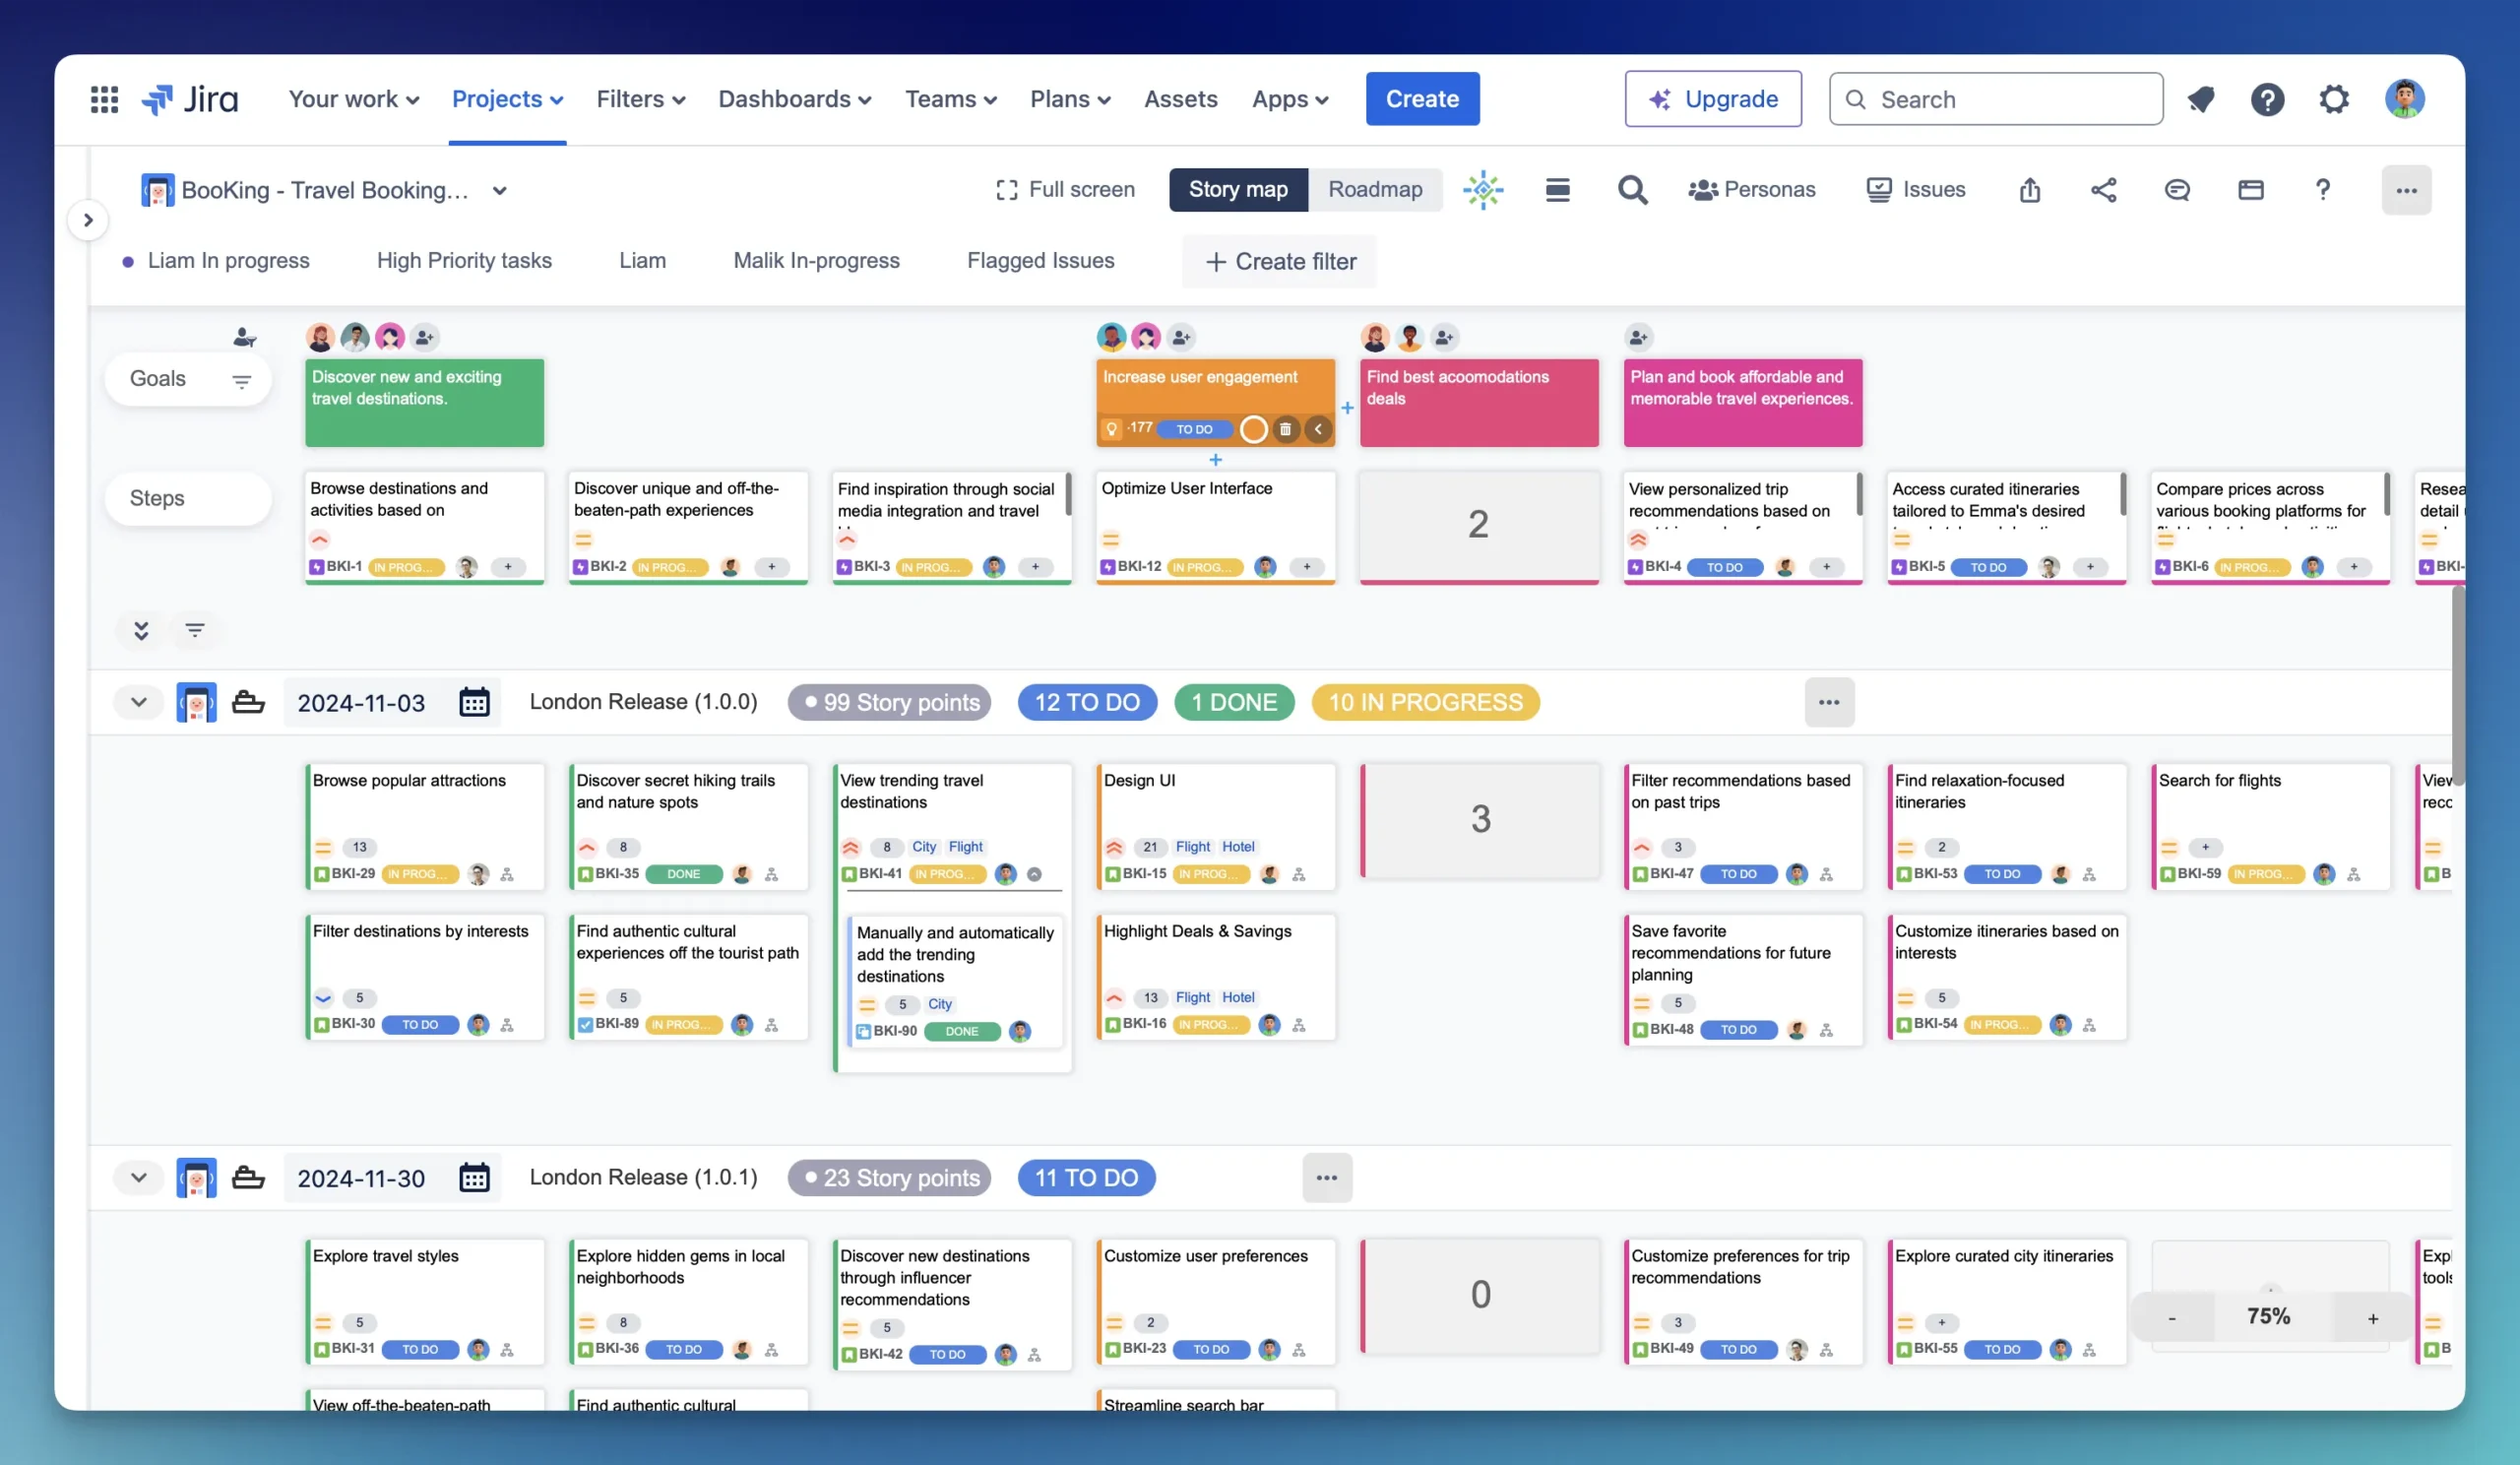
ProductGo stands out for its AI-powered capabilities, which help generate story maps, break down goals into actionable tasks, and refine product backlogs efficiently. These features save time and ensure a user-centric approach to MVP development.

If you’re looking for a single solution to streamline planning and collaboration, ProductGo is a top choice. It keeps teams focused on delivering value and managing projects effectively.
Examples of User Story Map
User Story Mapping is a versatile tool, and its applications span various industries.
For instance, an e-commerce site could focus on essential features like product search, cart management, and checkout flow.
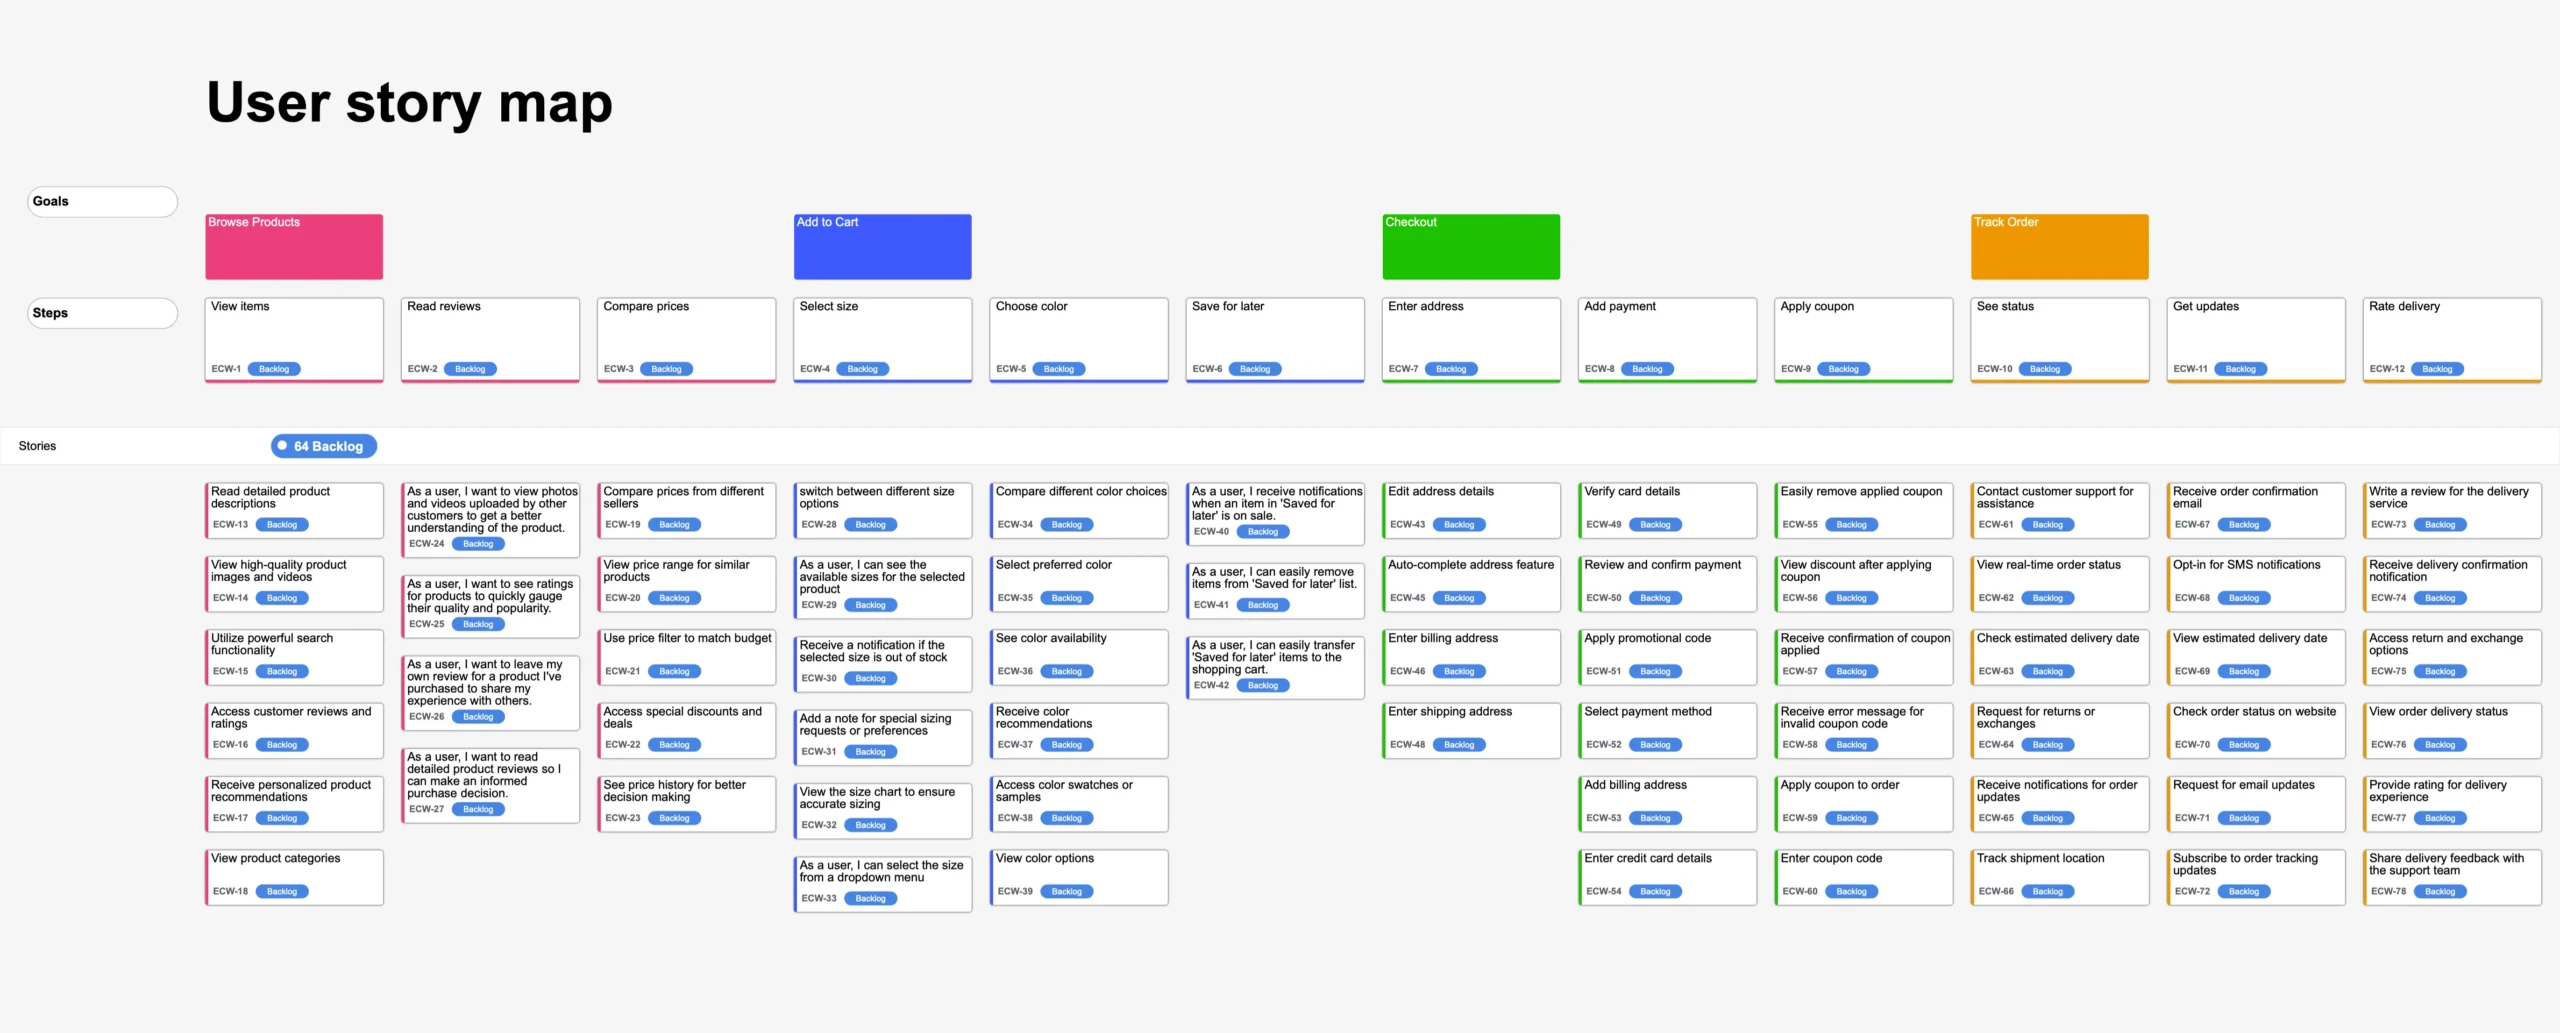
To explore more real-world examples and see how different teams have used User Story Mapping to streamline their product development, visit here!
Final Words
Building an MVP with User Story Mapping ensures that you stay focused on user needs while minimizing unnecessary work. It’s a method that promotes collaboration, prioritization, and continuous learning. By starting with the essentials and refining as you go, your product has the best chance to succeed.
Whether you’re just starting or refining your development process, tools like ProductGo and examples from other industries can provide the guidance you need. With these techniques in your toolkit, you’re well-equipped to build smarter and deliver faster.